These are the four key methods of testing for home’s water hardness:
- Run a Soap Suds Test | (Tells if You’ve Hard or Soft Water)
- Check Consumer Confidence Report (CCR) | (Provides Broad Overview)
- Use Water Hardness Test Strips | (For Basic Assessment)
- Send the Water Sample for Laboratory Testing | (For Most Accurate Results)
Method 1: Run a Soap Suds Test
The soap suds test, also known as the soap or lather test that quickly reveals your home’s water hardness using common household items and a few simple steps.
Gather these basic materials to conduct a soap suds test:
- Clean, transparent plastic or glass bottles or jars with tight-fitting caps
- Castile soap (recommended for accurate results)
- Tap water
Procedure:
- Prepare the Bottle: Fill about one-third of the glass jar with tap water.
- Add Soap: Add a few drops of Castile liquid soap to the water. Avoid commercial liquid soaps or detergents, as they are often formulated with chelating (like Citric Acid and Gluconic Acid) and sequestering agents (like sodium tripolyphosphate or potassium tripolyphosphate). These agents have ability to bind with the minerals in hard water, preventing them from causing problems like soap scum and reduced lathering.
- Seal and Shake: Tightly seal the glass jar with the cap and shake vigorously for 10-15 seconds, ensuring thorough mixing.
- Observation: Place the glass jar down and closely observe the water.
- Interpreting Results:
- Hard Water: If only a small amount of suds forms and quickly disappears, with the water turning cloudy, your water is likely hard. Hard water contains minerals like calcium and magnesium, which react with soap to create scum instead of suds.
- Soft Water: Conversely, if the water foams up quickly, producing many bubbles (suds) that persist for several minutes, and the water stays clear at the bottom of the glass jar, your water is likely soft.
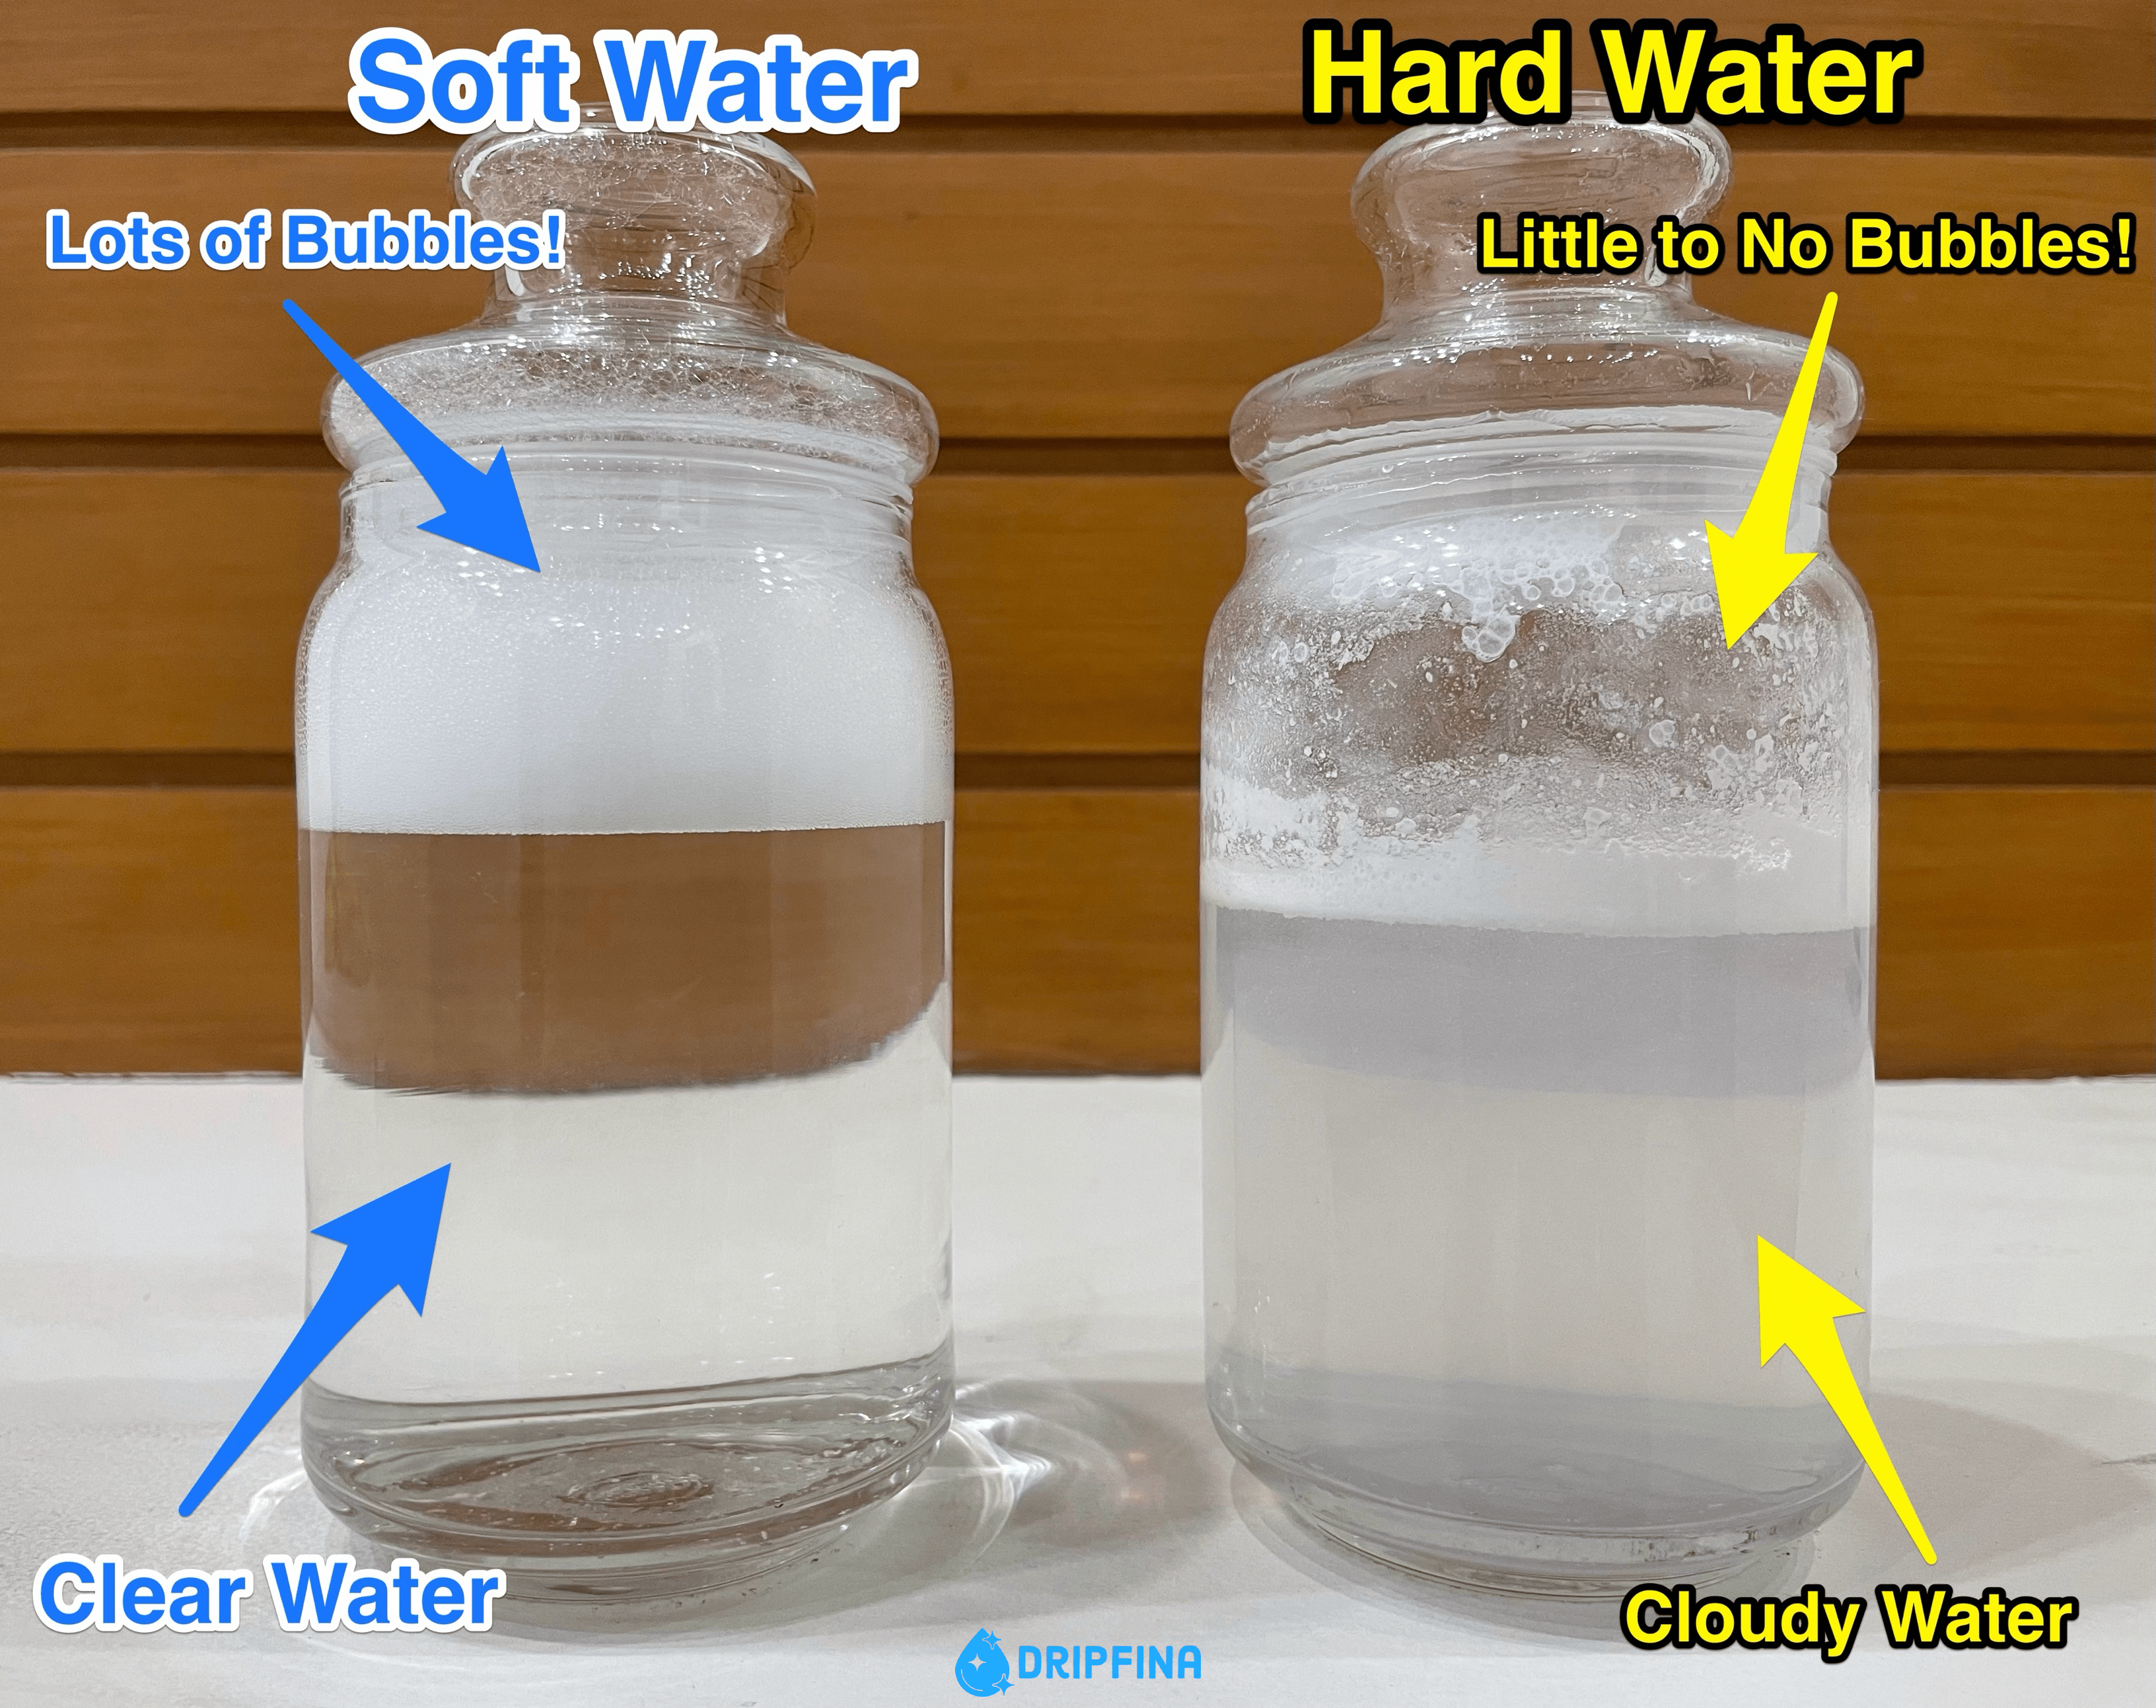
While any Castile soap will do a better job than commercial soaps or detergents, we recommend Dr. Bronner’s Pure-Castile Liquid Soap for the ultimate accuracy in your soap suds test. Made solely from vegetable oils, it’s free of interfering ingredients, ensuring your soap suds test accurately reflects the true nature of your home’s water, whether it’s hard or soft.
Method 2: Dive into Your Consumer Confidence Report (CCR)
The Consumer Confidence Report (CCR), also known as the Water Quality Report, is much more than just information about the safety of tap water in your area. It’s a comprehensive resource designed to empower you with knowledge about the quality of your drinking water and whether it meets the standards set by the U.S. Environmental Protection Agency (EPA) and state water quality authorities.
Mandated by the EPA for all public water systems, CCRs go beyond basic safety assessments. They provide key details about your water source and its treatment process, along with crucial parameters like:
- Hardness levels
- pH
- Total dissolved solids (TDS)
- Turbidity
- Chlorine
- Fluoride
- Lead
- Nitrate, and nitrite
While the CCR might seem technical at first glance, it’s designed to be user-friendly. Abbreviations are clearly defined, and essential terms are explained. This makes understanding the report easier, even if you’re not familiar with technical details like substances, units, Maximum Contaminant Level (MCL), Maximum Contaminant Level Goal (MCLG), and Residual Useful Life (RUL).
However, if you need further clarification or have any questions, don’t hesitate to reach out to your local water utility. You can also call the U.S. EPA Safe Drinking Water Hotline at 1-800-426-4791.
How to Interpret Consumer Confidence Report (CCR) for Water Hardness
When you’re concerned about water hardness, look for sections on water quality parameters like calcium carbonate (CaCO3), magnesium, and total dissolved solids (TDS) in your Consumer Confidence Report. While calcium carbonate is a major contributor to hardness, other minerals also play a role. Calcium carbonate is typically expressed in mg/L (milligrams per liter) or ppm (parts per million).
- Federal Regulations: There is no federally acceptable level for water hardness set by the EPA. The EPA only sets Maximum Contaminant Levels (MCLs) for health-related concerns, and water hardness does not have an MCL.
- State Guidelines: Individual states usually have different recommendations for acceptable hardness levels. These recommendations are typically based on factors like consumer preferences, appliance compatibility, and local water availability. For instance, in California, the Department of Public Health recommends a range of 80-120 mg/L for optimal water hardness. In contrast, Texas doesn’t have a statewide recommendation for hardness, leaving it up to individual water utilities to set their own guidelines based on local conditions and consumer preferences. Interestingly, some states like Florida and Arizona haven’t established specific hardness recommendations. This is because their naturally soft water rarely poses a problem for appliances or creates noticeable issues like soap scum.
- General Thresholds: While not universally applicable, most water treatment experts suggest a hardness level of ≤ 51.35 mg/L or ppm (3 grains per gallon) to minimize aesthetic problems. Exceeding this level can start to become noticeable in terms of soap scum, appliance scaling, and reduced lathering.
If you find the level of calcium carbonate (CaCO3) in water exceeding the acceptable levels of 51.35 mg/L or ppm (3 grains per gallon), consider addressing the hardness issues with a salt-based softeners or whole-house reverse osmosis systems. Each approach has its own advantages and disadvantages, so it’s best to research and choose the method that best suits your needs and budget.
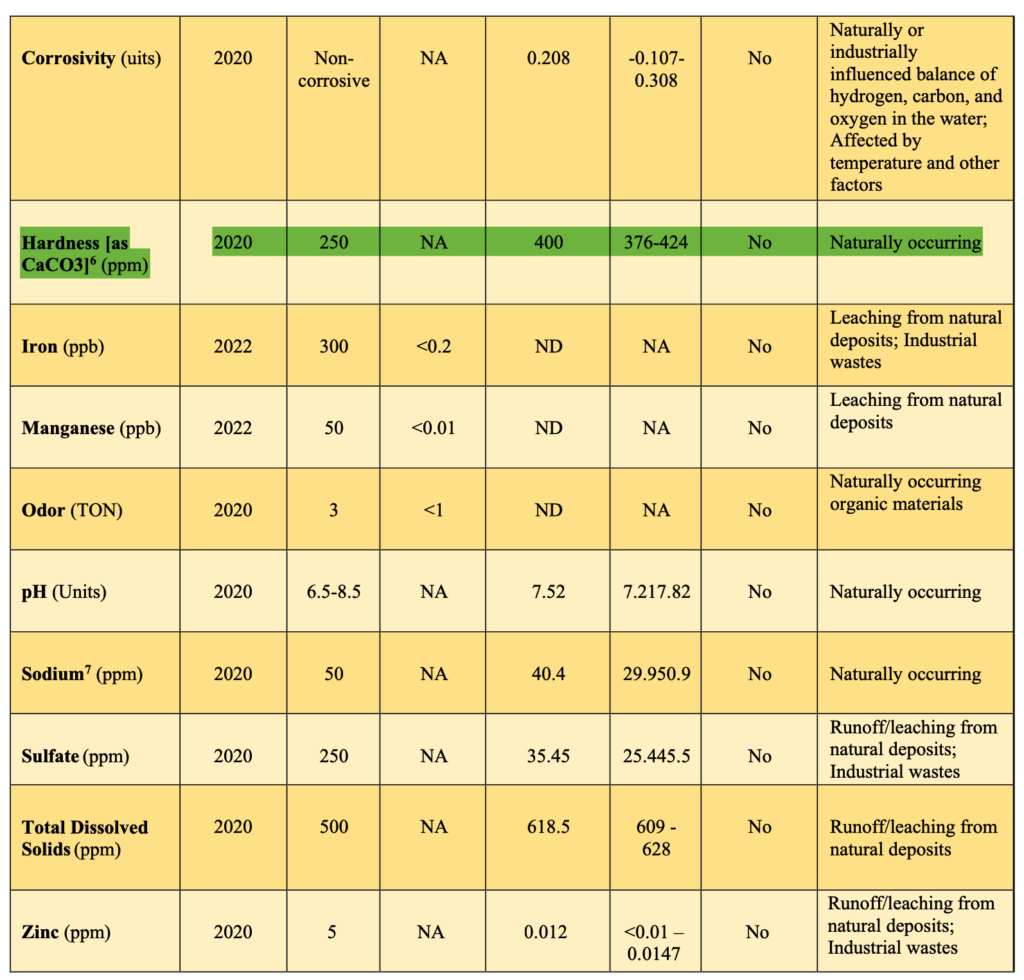
Finding Your Consumer Confidence Report (CCR)
For those with city-treated water, CCRs are usually mailed to your address by July 1st annually, though some water utilities provide them earlier or later and available online on your local water utility’s website. If you missed your CCR or aren’t responsible for the water bill (e.g., in apartments or condominiums), you can use the EPA’s CCR Finder tool to locate it directly. However, private well owners don’t receive CCRs as the EPA doesn’t regulate private well water; they need to test their water hardness independently.
Take a look at the CCR report from the Verona Township Water Department.
While CCRs offer valuable insights into your area’s water quality, they do have limitations:
- Limited Contaminant Coverage: They typically focus on a specific set of contaminants.
- Treatment Plant vs. Tap Water: They primarily reflect water quality at the treatment plant, not necessarily what reaches your taps.
- Accessibility and Readability: Finding and understanding CCRs can be challenging due to potential accessibility issues and technical language.
- Timeliness: They represent the previous year’s water quality, not necessarily the current state in your home.
For a more accurate and up-to-date understanding of your home’s water quality, consider testing methods like water test strips or, for the most precise results, laboratory analysis.
Method 3: Use Water Hardness Test Strips
Water hardness test strip offers a simple and speedy way to get a basic idea. They’re readily available and affordable, typically costing between $5 and $30 for a kit containing 100-150 strips. You can find them at home improvement stores or online retailers like Amazon, eBay, and Home Depot.
Using the Test Strips:
- Fill a glass with tap water directly from your kitchen.
- Dip a total hardness test strip into the water for 5-8 seconds, then remove it.
- Wait 30 seconds for the strip to undergo a noticeable color change.
- Match the strip’s color to the chart provided in the kit. This chart will tell you the hardness level in units like grains per gallon (gpg), milligrams per liter (mg/L), or parts per million (ppm).
- Interpret the results: The strip typically changes to shades of green or orange depending on the hardness level, usually falling within a range like soft, moderately hard, hard, or very hard (over 180 ppm).
Method 4: Send the Water Sample for Laboratory Analysis
Laboratory testing is the gold standard for accuracy and provides a detailed analysis of home’s water quality, regardless of its source. Whether hardness is your primary concern or you want a more comprehensive analysis, the process is straightforward:
- Receive a sample kit: It will be delivered to your home.
- Collect and package water: Follow the kit’s instructions for proper sample collection and packaging.
- Send the sample to the lab: Ship it as instructed.
- Receive a detailed report: The lab will analyze your water for the parameters you requested and send you a comprehensive report.
While testing for hardness is beneficial, it’s not enough, especially for private well owners. We strongly recommend a broader analysis that includes these additional parameters:
- pH
- Iron
- Manganese
- Tannins
- Total dissolved solids (TDS)
- Nitrates
- Nitrites
- Silica
- Sodium
- Sulfates
- Turbidity
- Bacteria (coliform and E. coli)
This comprehensive approach paints a complete picture of your water’s composition, ultimately aiding you in choosing the most effective water treatment system.
While testing each parameter individually can cost $30-$60 each, the total bill can quickly climb to $400-$1,600 or more, depending on the number of parameters tested. Fortunately, ETR Laboratories offers a budget-friendly solution: a comprehensive analysis covering 53 parameters, including hardness minerals, heavy metals, bacteria, and various pollutants, all for a reasonable $129. Order their Water Test Kit online through the SpringWell website, and it’ll be delivered to your doorstep within 1-2 business days.
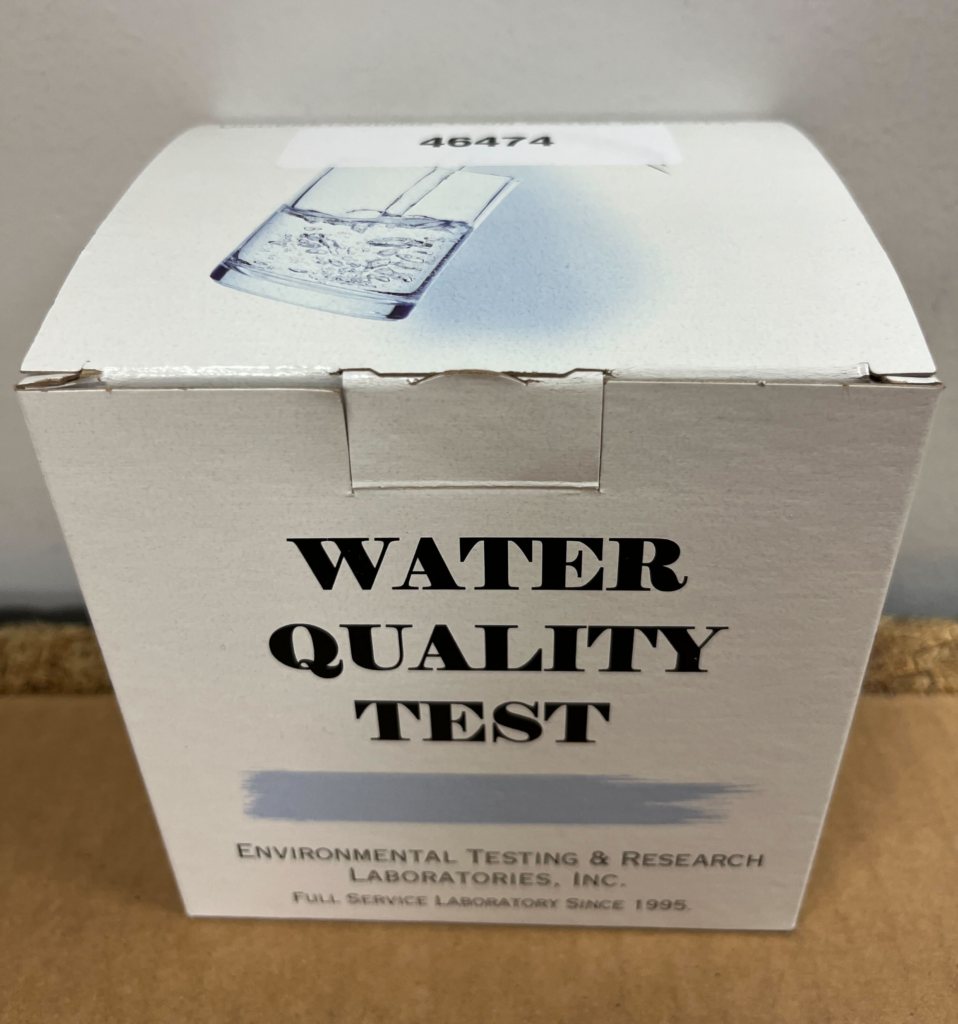
How to Collect and Ship the Sample for Laboratory Testing
To collect the water sample for laboratory testing, the first step is to run the cold water from your kitchen faucet for 3 to 5 minutes. This extended flushing helps eliminate any free-floating contaminants that might have built up in your plumbing system overnight.
For an uncontaminated sample collection, handle the container carefully. Avoid rinsing or making contact with the inside of the provided container and its cap. This precaution helps prevent any accidental contamination. If you observe any visible contamination or sediment, remove aerators or faucet attachments that could introduce impurities into the sample.
When filling the sample container, use a gentle, low-flow stream of water to prevent splashing and fill it almost to the top of the rim. Lastly, close the lid tightly. For comprehensive testing, multiple sample containers are often provided by the lab. Nevertheless, it’s recommended to collect all samples from the same faucet to ensure consistency in the results.
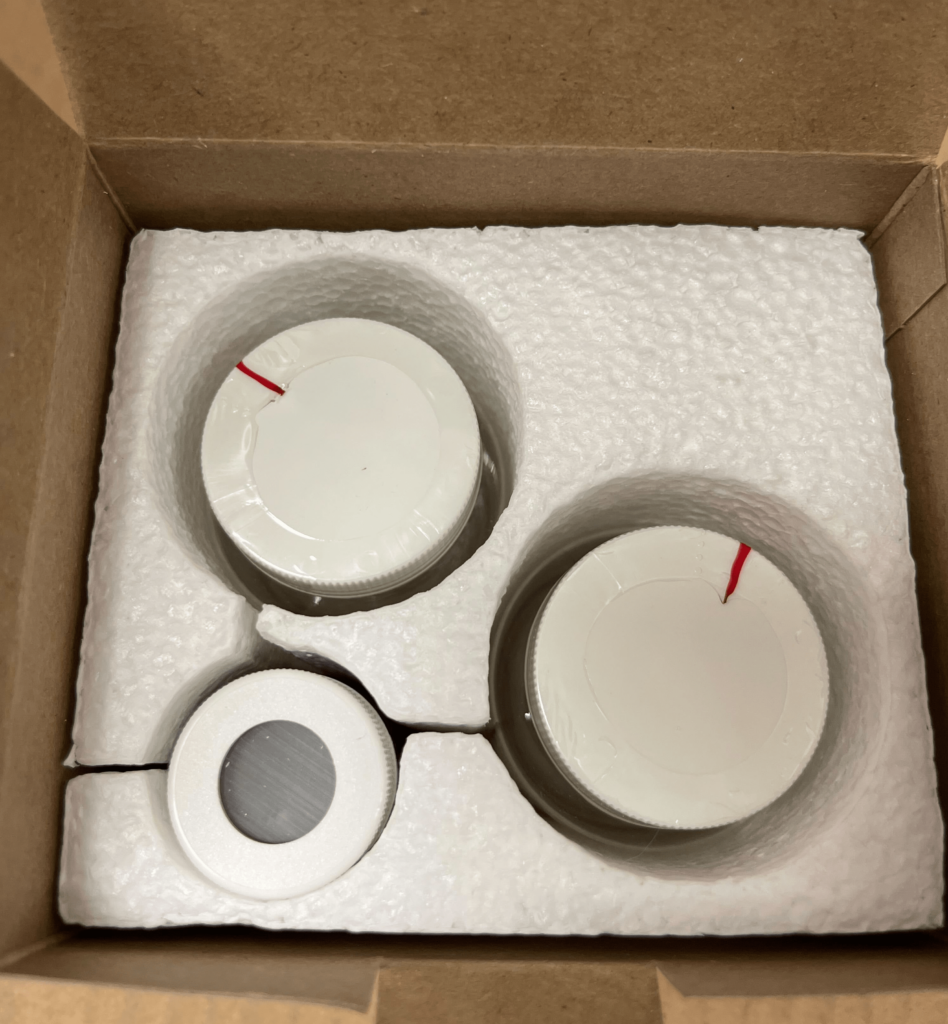
Once the water sample is properly collected and packaged, send it to the lab as soon as possible. If there’s a delay, store it in the refrigerator, to prevent any changes in water quality over time.
If you’ve obtained the water testing kit from ETR Laboratories, the process becomes even more convenient. ETR Laboratories simplifies the shipping procedure by providing you with a return shipping label. With this label, you can effortlessly hand the prepared sample to a USPS postal service employee, adhering to the specific shipping instructions provided by the laboratory.
ETR Labs aims for quick turnaround times, typically providing results within 2 to 4 working days from the date samples are received at the laboratory, often even faster, ensuring a timely and accurate assessment of your home’s water quality.
One notable advantage is that there are no hidden or additional fees involved, ETR Laboratories covers all shipping costs, both for sending the water testing kit to you and returning your sample.
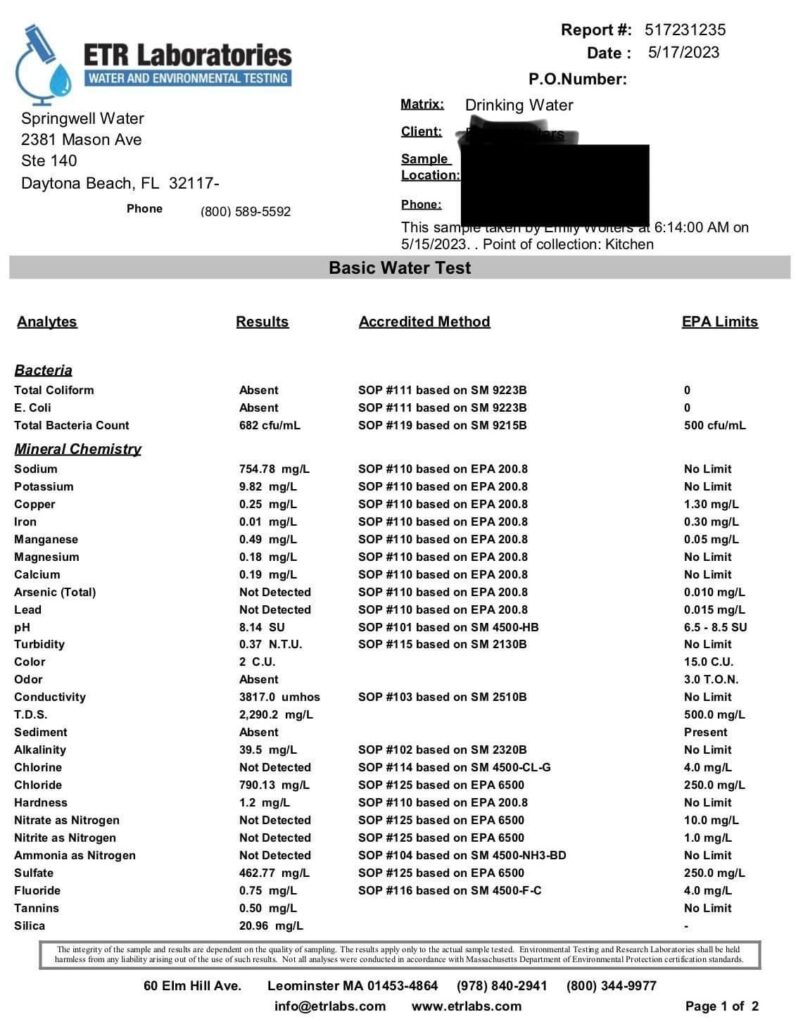
How to Interpret Laboratory Test Results for Water Hardness
To interpret your laboratory test results for home’s water hardness, focus on the concentration of calcium and magnesium ions, which combine to form calcium carbonate (CaCO3). These hardness ions are responsible for the water’s propensity to form scale buildup in the home’s plumbing pipes, fixtures, and water-based appliances like coffee makers, kettles, dishwashers, and washing machines. Heating systems like water heaters, boilers, and steam irons are also susceptible to scale buildup, leading to decreased efficiency and premature failure.
Water hardness is typically measured in grains per gallon (gpg) in the United States, although it can also be reported in milligrams per liter (mg/L) or parts per million (ppm). The United States Geological Survey (USGS) classifies water into different categories, ranging from “soft” to “very hard,” based on the concentration of calcium carbonate (CaCO3).
| Classification | CaCO3 (mg/L or ppm) | CaCO3 (grains per gallon) |
|---|---|---|
| Soft water | 0 – 60 | 0 – 3.51 |
| Moderately hard water | 60.1 – 120 | 3.51 – 7.01 |
| Hard water | 120.1 – 180 | 7.01 – 10.52 |
| Very hard water | 180+ | 10.52+ |
